Jan. 6, 2015 by Karen Warren
Wesfiles is back online. Thank you for your patience while we addressed the issue.
Posted in syndicated-posts, Urgent
Jan. 6, 2015 by Karen Warren
There is a critical issue on Wesfiles that requires immediate attention in order to prevent data loss. At 2:30, ITS will be taking Wesfiles offline for what we hope is no more than an hour.
Please save your work and copy any files you must work on between 2:30 and 3:30 to your local drive if you need access.
Posted in syndicated-posts, Urgent
Nov. 19, 2014 by Karen Warren
Network services have been restored across campus. ITS located the source of the disruption that interrupted services across campus for over an hour this afternoon. Not all segments of campus were impacted equally during that time. Because email communication was impacted, ITS utilized its social media outlets to try and spread the word. As a reminder you can follow us on Twitter @WesleyanITS or on Facebook https://www.facebook.com/WesleyanITS.
Posted in syndicated-posts, Urgent
Nov. 19, 2014 by Karen Warren
ITS is working on a network problem that is affecting services throughout campus. Some buildings are offline and other services are slow to load. We are addressing the problem as quickly as we can and will keep the community notified.
Posted in syndicated-posts, Urgent
Nov. 17, 2014 by Karen Warren
The most recent OS update for Mac called Yosemite (version 10.10) has been causing problems for some users including frequent dropping from wireless networks and complications with Java.
ITS strongly recommends that, for now, Mac users refrain from upgrading their operating system to Yosemite (version 10.10). In the meantime, some of our software vendors are working on patches to help address problems affecting their programs and Apple is working on an updated release to help address the reported problems.
ITS staff will test the newer version when it is released and update the community.
Please consult your Desktop Support Specialist or the Student HelpDesk if you have questions about upgrading your Mac.
Posted in maintenance, syndicated-posts
Nov. 3, 2014 by Karen Warren
The annual password reset is upon us. The deadline for changing your password is Wednesday, November 12 at 2:00 PM. Failure to change your password by this time will result in loss of access to all Wesleyan resources that require a password, including Email, EPortfolio, Moodle and WesFiles. This is the first of three notifications. Once you have changed your password, you will no longer receive them.
Change your password in EPortfolio, Tools and Links > Password Manager.
**Once you change your password, you must remember ALSO to change it on your wireless and mobile devices**
What to do if you miss the deadline? You have two choices.
One:
Use the new Self-Serve Password Reset application.
On the Login Screen, click Forgot Password?
Note: this requires you have either your WesID card or an alternate email address on file in your EPortfolio. See http://itsinfo.blogs.wesleyan.edu/2013/10/23/self-serve-password-reset/for more information on using this application.
Two:
Contact the appropriate ITS staff to unlock your account:
Students – ITS Helpdesk at (860)685-4000 or x4000
Faculty and Staff in academic departments – your Desktop Support Specialist or
ITS Operations (860)685-4100 x4100
Staff in administrative departments – Administrative Helpline (860)685-4777 (x4777)
or ITS Operations (860)685-4100 (x4100)
Posted in maintenance, syndicated-posts
If your site has a five image header across the top of the site, here are instructions as to how you can edit and change your photos.
- First, you want to make sure your photos are cropped to size.
- If your site has a white border between images, then should be cropped to 190 px by 192 px (width x height).
- Example of white border: Sociology

- If your site has no border between images (each photo sits right next to another), then images should be cropped 192 px by 192 px (width x height).
- Example of no border: Government

- Once your images are cropped, you need to upload it to your site. Go to your site in Cascade.
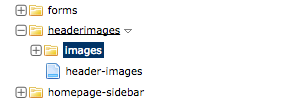
- In your left hand navigation tree, select the folder “headerimages”. Some sites may have a folder instead called “random-squares”. These are the same folder, but with different names. Select the one you find in your site.
 OR
OR
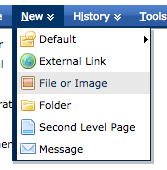
- Select the “images” folder within “headerimages”, then upload your new images by going to the blue toolbar, “New” > “File or Image”.
- After you’ve uploaded your new images to the “images” folder, you need to edit the file “header-images”, which may also be named “squares”.
- Select “Edit” from the tabbed menu bar after you’ve selected the file, then you can add your new images to the file.
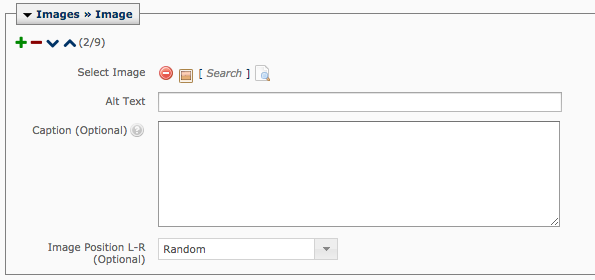
- The green “+” button allows you to add a new image.
- The red “-” button removes a previously used image from the header.
- The “^” or its inverse allows you to move an image higher or lower in the list.
- “Select Image” is where you’ll navigate to the “images” folder where you uploaded your new image.
- “Alt Text” is a short description of what the image is.
- Some files (mainly the ones named “squares”, do not have the “Caption” or “Image Position L-R” options. This is normal.
- Once you’ve made your changes, be sure to hit “Submit” at the bottom of the page.
- Publish your entire site so these changes will appear.
Posted in syndicated-posts, Training
Oct. 24, 2014 by Karen Warren
Comcast has been able to determine that they can reset the devices remotely. This takes approximately 15 minutes per device. Because we are not confident we can narrow this down by address, this will be done on every unit we have. Even if your unit was not affected, you will experience a brief downtime for this reset. Going through all 168 devices will take several hours. Comcast technicians are beginning the process now and plan to work through much of the night. All houses are expected to have coverage restored by the morning.
ITS staff is on call and will be in contact with the Comcast technicians to receive progress updates.
In order to track if anyone has not come back online, we have created a simple form. If you do not have Internet connection via wireless OR wired after 1:00 PM on Oct 25, please complete the following form.
https://docs.google.com/a/wesleyan.edu/forms/d/1FLBUtPeZFpwRqlkX5Qv92VVDIaF2lf_24edDo7YyZB0/viewform?usp=send_form
We will stay in contact with Comcast throughout the weekend.
Posted in syndicated-posts, Urgent
Oct. 24, 2014 by Karen Warren
Comcast is on site dealing with an outage affecting more than 50 woodframe houses. We are helping them to get this resolved as quickly as we can. We will update as we know more.
Posted in syndicated-posts, Urgent
Here are instructions on how you can create a Google form, embed it on your site, or share it with others.
- First, make sure that you are creating a Google form through your Wesleyan account–all information in your Wesleyan Google account is inaccessible by Google.
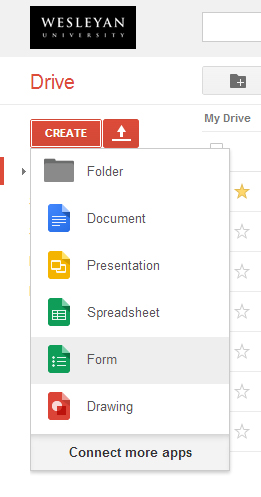
- From your ePortfolio, you can access “Docs”. This should take you to Google Docs (may also be named Google Drive, they are the same thing).
- On the upper-left, there should be an orange button named “Create”. Select this button and in the dropdown that appears, select “Form”.
- Once you select form, Google will take you to a new window. The first thing that appears are options to choose a title or a theme for your form. Enter a title for your form and select a theme. You may also change both of these later on. Hit “OK” once you’ve made your changes/selection.

- There are now various things you can do to set up your form.
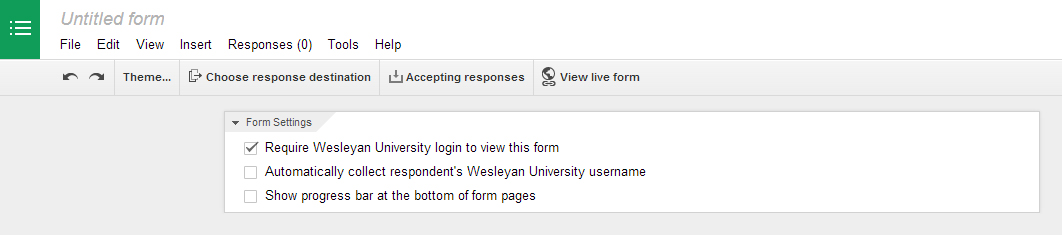
- First, the Form Settings section at the top of the page gives you the option to:
– Require Wesleyan University login to view this form
– Automatically collect respondent’s Wesleyan University username
– Show progress bar at the bottom of form pages
Check the boxes of the options you want.
- Now you can customize your form. See below for the various customization options for your form.
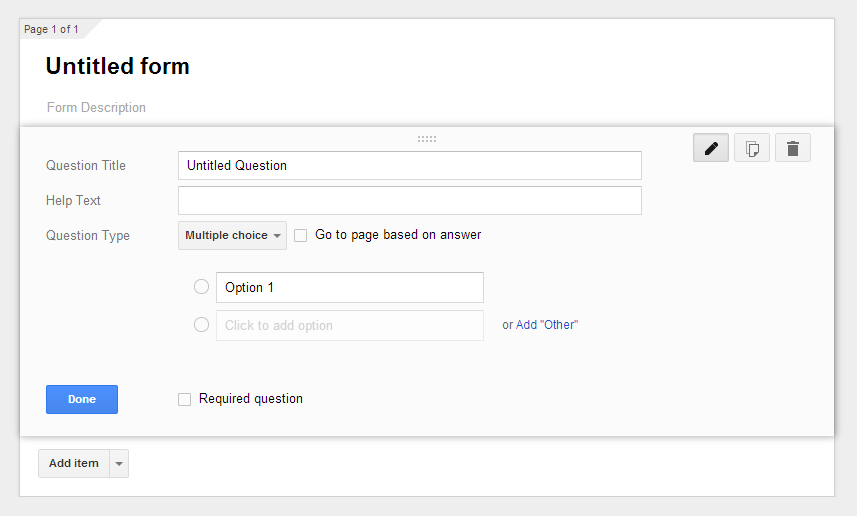
- Where it says “Untitled form”, you should name this form–this name here is what will appear at the top of your form when you share or embed this form.
- You can give this form a “Form Description” to explain or give more information to this form.
- You may now add questions or other sections. There are variety of question types or items that you can add to your form.
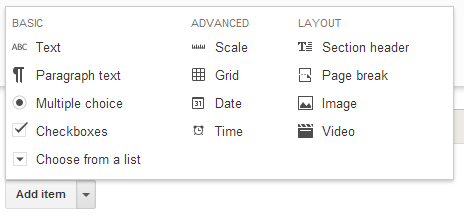
- “Text” is an item in which you can ask a question and expect a shorter response.
- “Paragraph text” allows the respondent to have a more lengthy response.
- “Multiple choice” allows you to set up different answer selections and to select with a circular button.
- “Checkboxes” are the same as Multiple choice, aside from the fact that it appears not as a circle but a check mark.
- “Choose from a list” also allows you to set up various answer selections but the respondent would select one answer from a drop down list of options.
- “Scale” allows you to set up a scale response, in which you would set up the range (by default, it is from 1 to 5), and you can define the range (e.g., 1 as “angry” and 5 as “happy”) and respondents will select within that range.
- “Grid” allows you to define variables in a table format with various answer possibilities.
- “Date” and “Time” allow you to ask respondents regarding date and time.
- “Section header” allows you to define new sections of your form/questionnaire.
- “Page break” will cut your form into different pages, making the respondent click “next” to move onto the next page.
- “Image” allows you to upload an image while “Video” allows you to insert a video.
- You can also mark each question as required by clicking the box “Required question”.
- You may also now define what appears on the confirmation page after the respondent submits the form.

- You can change “Your response has been recorded” to whatever message you want to appear or select these other options.
- “Send form” will allow you to share this form via a link, social media, or invite users through email. You can also select “Embed” to find the code you will need to paste into your website’s page in HTML to have it appear on your site. This “Send form” button appears both at the end of the Google form page as well as on the top right corner at all times.

- You will now want to also make sure that at the top of the page, the setting is to “Accepting responses”. You can also “View responses”, which should take you to a separate Google spreadsheet with all the responses collected.
Posted in syndicated-posts


