The following is some documentation on how you can create a new exhibition in the CEAS website.
- First, log into Cascade and navigate to your website.
- Once you arrive at the CEAS dashboard, navigate to the exhibitions folder on the left hand navigation tree, then the all folder.
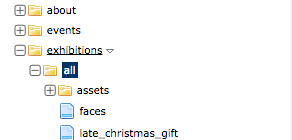
- Once you navigate to all, select the assets folder before you create your new exhibition page. You need to first create a folder to hold the images you’re going to use.
- Once you’ve selected assets, go to the blue navigation bar on top, select New, then select Folder.

- Name that folder the name of your exhibition. For example, “faces”, “late_christmas_gift”, or “not_of_this_world”. Use underscores between words for consistency and clarity.
- Once you’ve created that new folder, select that new folder with whatever you named it from the left hand navigation tree.
- In that new folder, upload the images or other assets you need for this new exhibition page. Be sure to upload one main image to be displayed on the page, as well as one thumbnail image (which needs to be 60 x 60 px) for the exhibition index page.
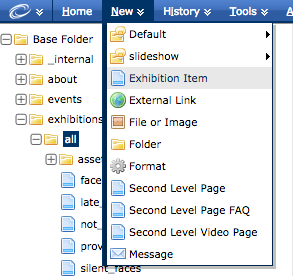
- You are now ready to create the exhibition page itself. First, make sure that the all folder, not the new folder you created nor the assets folder, is selected in the left hand list of navigation. Then, in the blue nav toolbar up top, select “New”, then select Exhibition Item.
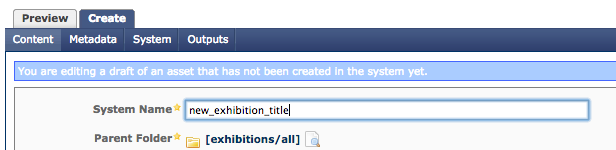
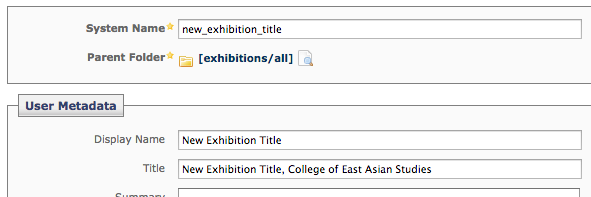
- In the page that appears after you select Exhibition Item, give your page a System Name. This is what appears as the page’s url (i.e., http://www.wesleyan.edu/ceas/exhibitions/all/systemname.html). The System Name should be the same as what you named your just created assets folder. For example, “faces”, “late_christmas_gift”, or “not_of_this_world”.
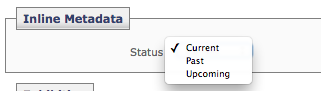
- Then, in the Inline Metadata section, in the dropdown, select if your exhibition is “Current”, “Past”, or “Upcoming”.
- In the Exhibition section, you can now give your exhibition the full title, start and end date and time, as well as link the Thumbnail Photo you uploaded into that newly created assets folder earlier (remember, the thumbnail needs to be 60px x 60px). Each field with a yellow asterisk is required for this page to be completed.
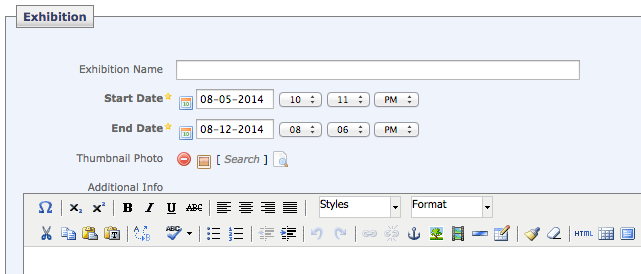
- In the two sections called Additional Info and Content, you can add more information, as well as place in a larger exhibition photo, in those text areas.
- When you finish all of the above, ensure that you go into the Metadata tab and input Display Name for this page and a Title.
- You’re now ready to go to the bottom of the page and hit Submit!
Posted in Department Guides, syndicated-posts
For the Center for Humanities and Masters/GLS websites, you have the ability to change the video that is embedded into your top header on your index page. Here is how you may do so:
- First, select the “header” block, which can be found within your “video-header” folder in your left hand navigation list.

- Then hit “Edit” to edit your block.

- You should arrive at the following page to make your changes:

- Do not change or edit the “Data Definition” field.
- First to change your video, you must change the image that goes along with the video in your header. This image should be uploaded into the “images” folder that is also housed within your “video-header” folder.
- The image should have the dimensions 193 px by 217 px.
- Then you may add a caption in the “Caption” text field.
- If you’re using a YouTube video, paste the URL of the video here. Ensure that this is the shortened version of the URL, so it should look something akin to: http://youtu.be/GI8v1RWj1wY
- You can find this shortened link on your YouTube video’s page under the “Share” tab.
- If you’re using a Brightcove video, paste your video ID in the “Brightcove Video ID” field, and select the account in which this video can be found in the “Account” dropdown.
- When using Brightcove, you must ensure that the YouTube field is empty, as well as vice versa.
Posted in Department Guides, syndicated-posts, Training
Oct. 4, 2014 by Karen Warren
ITS has resolved a problem that resulted in an interruption of services from approx 5:15-5:45 pm on Sat, Oct 4. The problem caused sporadic inability to login and disrupted the cash registers. All services have been restored.
Posted in syndicated-posts, Urgent
Wesleyan has launched the newly redesigned Office of Equity & Inclusion website. You can visit the site here: www.wesleyan.edu/careercenter.
Posted in Cascade websites, syndicated-posts
Wesleyan has launched the newly redesigned Wesleyan Physical Sciences and Mathematics Scholars Program website. You can visit the site here: www.wesleyan.edu/wpsmp.
Posted in Cascade websites, syndicated-posts
Wesleyan has launched the newly redesigned College of East Asian Studies website. You can visit the site here: www.wesleyan.edu/ceas.
Posted in Cascade websites, syndicated-posts
Sep. 1, 2014 by Karen Warren
We believe that the system performance issues we experienced this morning have been resolved. One of the services that experienced disruption was Drop/Add in Portfolio. Because students are eager to find out whether they have been admitted into the courses for which they have entered enrollment requests, Ruth Weissman is asking all faculty members to access their electronic portfolios as soon as possible and to review and act on enrollment requests they may have received.
We apologize sincerely for the inconvenience.
Posted in syndicated-posts, Urgent
Sep. 1, 2014 by Karen Warren
ITS has received several reports of problems accessing EPortfolio and PeopleSoft. We are investigating the issue and will report on our progress.
Posted in syndicated-posts, Urgent
Wesleyan has launched the newly redesigned Office of Equity & Inclusion website. You can visit the site here: www.wesleyan.edu/inclusion.
Posted in Cascade websites, syndicated-posts
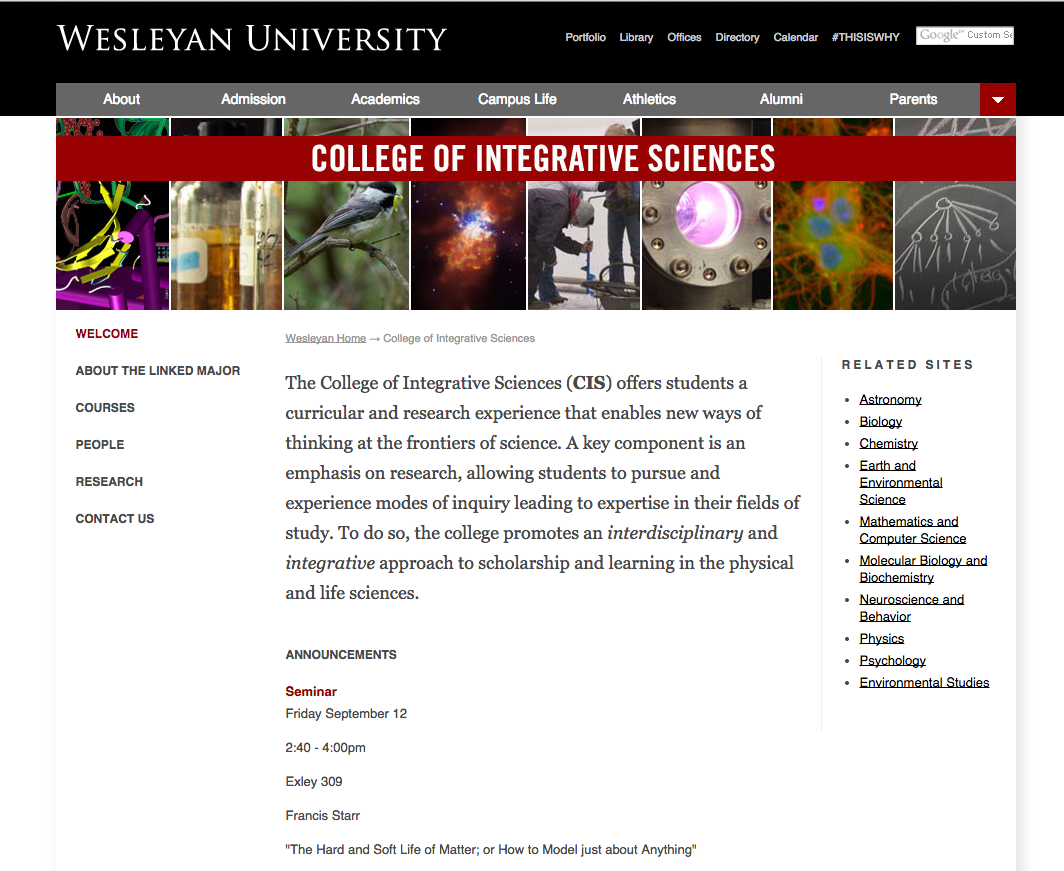
Wesleyan has launched the newly redesigned College of Integrative Sciences website. You can visit the site here: www.wesleyan.edu/cis.
Posted in Cascade websites, syndicated-posts