Oct. 7, 2013 by Karen Warren
Several people had problems connecting to VPN on Sunday, 10/6 and part of today 10/7. ITS resolved the issue this morning just prior to 11 am. If you are still experiencing problems connecting through VPN, please contact your Desktop Support Specialist.
Posted in syndicated-posts, Urgent
Autosaving in Cascade
Cascade now has an autosave feature.
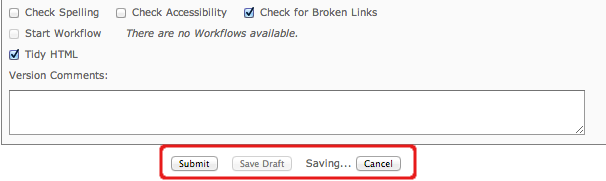
Drafts of your page are saved automatically in the background as you edit. You will see the drafts being created and saved at the bottom of your edit page.
You will see a message above the edit box informing you that you are editing the draft.
You should continue editing as you always have and Submit the page to save it in the database. This draft will only become important if your edit session is interrupted (a browser crash, system crash…)
There are two ways your draft is saved
- If for some reason you lose your edit session your edits will be saved in the draft.
- If you Cancel your edit session your edits will be saved in the draft.
When you return to edit the page that has the draft you will have the option of editing the Current page or editing the Draft (which has your recent changes that were not submitted)

If you select Draft you will be able to:
- preview the draft
- submit all of your edits and make the draft the current page
- delete the draft and all of your recent changes
- continue editing the draft
- when you submit this draft it will become the current page
If you select Current you will:
- edit the original page
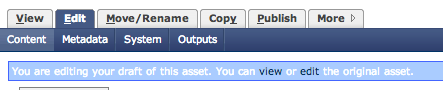
- you will see the following across the top of the edit window — it tells you that there is a draft of this page that you can edit or discard.

- when you save edits to the Current page you will discard the draft

Posted in syndicated-posts, Training
When you login to Cascade you will notice that there have been a few changes to your site’s Dashboard.
- The Recycle Bin, although still accessible in the tabs on top of your Dashboard, the link within the Dashboard itself has now moved into the middle section of the Dashboard, under “Manage Content.”
- Workflows and Messages now appear under the section to the right, “Current Activity”.
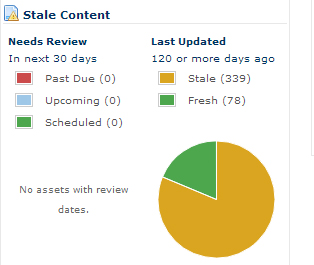
Stale Content
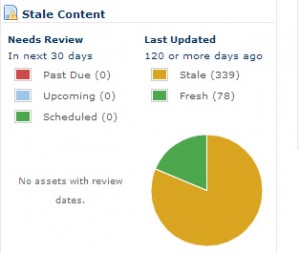
- A new feature under the center section, “Manage Content”, is a subsection called “Stale Content”. This feature shows you which of the content/pages on your site is “Fresh”, or pages that have been updated in the past 120 days, or “Stale”, pages that were last updated over 120 pages ago.
- you can change the amount of days for each
- click on either In next 30 days or 120 or more days ago
- change the number of days
- you can see the files referenced defined in each section
- click on any of the items (Past Due, Upcoming, Scheduled, Stale, Fresh)
- – or — ckick on the colored sections of the pie chart
- see the files that meet that criteria
Many pages in Wesleyan’s extended website do not change content frequently, thus many sites and pages may be “Stale”. This does not affect the quality of your site or the function of your site in any way. You may choose to disregard this subsection.
Posted in syndicated-posts, Training
Oct. 4, 2013 by Karen Warren
There was a network disruption for about 90 minutes this afternoon, Oct 4, from 5-6:30 that affected several dorms including all of the Foss buildings. ITS has been tracking down a problem that has been causing intermittent disruptions in network traffic for over a week. The issue has been particularly challenging to address, but we are able to detect it very quickly once it starts. We hope and believe we made progress toward a resolution. We are keeping a close eye on the situation and have monitors in place.
Posted in syndicated-posts
If you need to embed a video on a page in your Cascade website contact the New Media Lab. They will put a new asset on your site that will allow you to create a new page that contains your video. Once they have set up your new asset you can follow the directions below.
- Before you create a new video page you will need to determine where the page will fall in the navigation
- Remember a page will appear in the navigation based on what folder it is in
- Highlight the folder where you will be putting the new video page
note: if it is in the main navigation high light the Base Folder
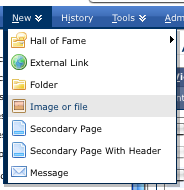
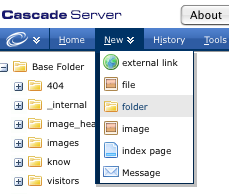
- To create a new page you will need to use an asset from the New menu in the blue bar at the top of the screen
- Select “Second Level Video Page”
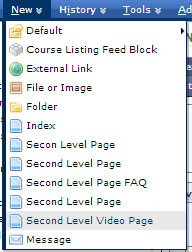
- note: your site may have different page assets for each folder
- if you have questions email nmlhelp@wesleyan.edu
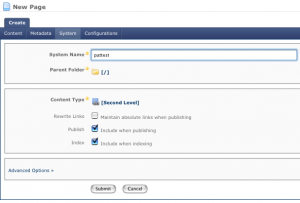
- you will see the following screen
- In the New Page screen enter
- System Name: the file name used in the url (do not enter the .html). For example, if you are making a page for awards, make the system name ”awards”
- remember to use good web naming conventions
- no spaces; use underscores or dashes instead (e.g. student_awards)
- no special characters (? ! .)
- use capital letters sparingly
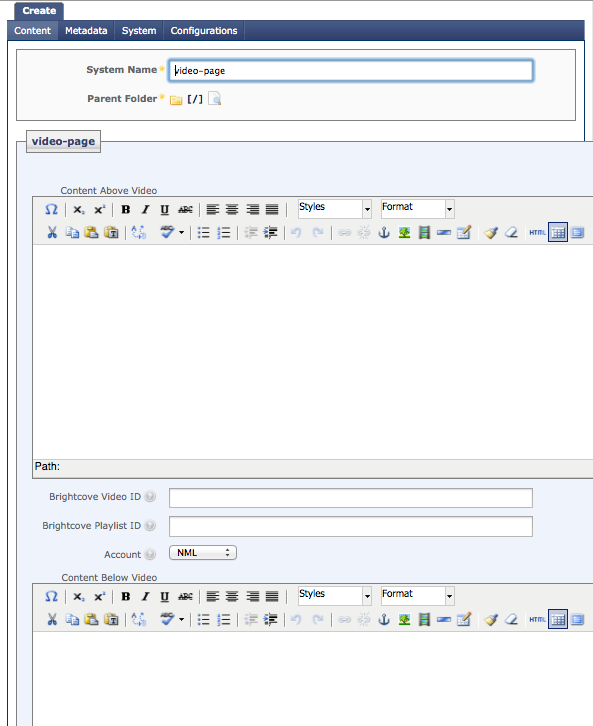
- Content Above Video: enter the content you want to appear above the video
- this may be a title that relates to the video (using Heading 1)
- this may be a paragraph introducing the video
- this may be left blank – there will be nothing above the video
- use the wysiwyg editor to format your text in this section
- BrightCove Video ID or Brightcove Playlist ID: this will be given to you by the NML.
- You may use only one of the two ID options, one must be left blank.
- Both IDs are 13 digits that will be provided by the NML or the upload video screen
- Account: dropdown is defaulted to NML
- the account will be provided to you by NML or the upload video screen
- Content Below Video: enter the content you want to appear below the video
- this may be a paragraph about the video
- this may be left blank – there will be nothing above the video
- use the wysiwyg editor to format your text in this section
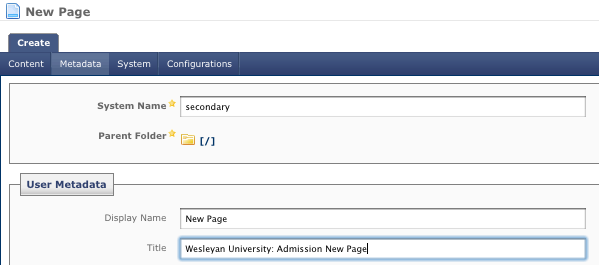
- after entering/formatting your data click the Metadata tab

- In the User Metadata section enter:
- Display Name: the name that will appear in your navigation (e.g. Student Awards)
- Title: the title to appear on the top of the window in your browser.
Format as Name of Page, Department or Office (e.g. Student Awards, Psychology)
- click the System tab
- System Name: the file name used in the url (do not enter the .html); likely this is already filled in from when you entered the system name on the New Page screen
- Parent Folder: be sure the correct folder is listed if not click on [/] to change; use the navigation box that appears to select the correct folder
- Publish: if you do not want this page to be published you can uncheck the publish box
- Index: if you do not want this page included in the navigation uncheck this
- to save click Submit
- if the page looks good you can publish it
- remember, if it is a new page in your navigation you should publish your whole site
Posted in syndicated-posts, Training
Sep. 30, 2013 by jgoldfield
The message waiting lights on the Nortel phones should be working normally now. Once you check your messages, your light should be back in synch.
Thank you,
Allen Alonzo
Posted in syndicated-posts
Sep. 30, 2013 by jgoldfield
We are working on resolving the Message Waiting Light problem on the Nortel Phones. You may have a message even if your light is not illuminated, and after you clear all messages the light may not turn off. We will let you know as soon as we resolve the issue. Until then, please check your voice mail by dialing 2222.
Thank you,
Allen Alonzo
Posted in syndicated-posts
Many times, in order to view the most recent changes to your webpage, you’ll need to clear the copies of old files your browser has saved in what is called a cache.
Typically, you can fully reload a webpage by simply holding onto the shift button on your keyboard while using your mouse to hit refresh in the web browser window.
Here are instructions to fully clear your cache:
Firefox
- In your Mozilla Firefox web browser on your computer, select the Firefox menu button on the top left of the window. It is typically an orange rectangle.
- In the menu that appears, go to the top right and select the triangle option next to the word “History”.
- Another menu should appear beside that. In that menu, select “Clear Recent History…”
- A dialog will appear. Select the time range to clear, then hit the arrow for more “Details”. Ensure that Cache is selected.
- Select “Clear Now”.
Internet Explorer
- In your Internet Explorer web browser on your computer, select the menu button on the top left of the window. It is typically a gear icon.
- In the menu that appears, select “Safety” from the list.
- Another menu will appear alongside the original. Select “Delete Browsing History” from the options.
- Ensure that “Cookies and website data” is selected.
- Select “Delete”.
Chrome
- In your Google Chrome web browser on your computer, select the three bar icon on the top right, the menu button.
- Select Settings down the list.
- At the bottom of that window, select “Show advanced settings…”
- Under the section “Privacy,” select “Clear browsing data…”
- Ensure that “Empty the cache” is selected, and in the pop up, select which period of time you wish to delete your browsing data.
- Select “Clear browsing data.”
Safari (Desktop)
- In the Safari menu, you may directly select to “Empty Cache”.
- Confirm deletion in the dialog that pops up.
- Or, you can select “Reset Safari”.
- In that case, confirm that selection by selecting “Reset”.
iOS Safari (Mobile)
- In your homescreen of your iPhone, iPad, or iPod Touch, select the “Settings” app.
- In the menu options, select “Safari”.
- At the bottom of Safari’s settings screen, select “Clear cookies and data”, or it might say “Clear Cookies” and “Clear Cache”.
- When prompted, confirm the deletion.
Android
- Open your web browser on your Android mobile device.
- Hit the menu button, then either press “More” or “Settings”.
- Select what might be “Privacy” or “Privacy Settings.
- Then select what might say “Clear Cache” or sometimes, “Clear Browsing Data”.
- Accept any pop ups if there are any to clear your cache.
Opera
- In your Opera web browser on your computer, select the Opera menu button on the top left of the window. It is typically an grey rectangle with part of Opera’s red “O”.
- In the menu that appears, select Settings from the list.
- Another menu will appear to the side. Select “Delete Private Data…” from that list.
- Select the options you want, and ensure “Delete entire cache” is selected.
- Hit “Delete”.
Posted in syndicated-posts, Training
The following is documentation for the Cascade upgrade that will take place October 15h, 2013.
Cascade offers two ways to Move a file or folder
– One
- highlight the file or folder to be moved
- select the Move/Rename tab on the top of the page
– or –
select Move/Rename from the down arrow next to the file name 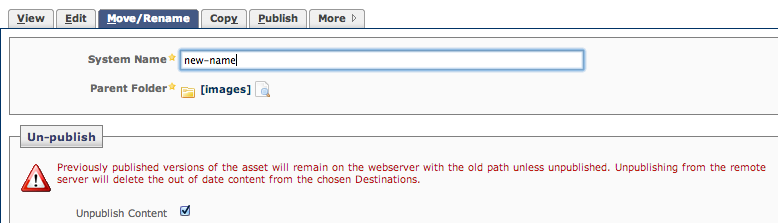
- In the Parent Folder section use the Magnifying glass
 to select the new location
- be sure the Unpublish Content box is checked
- Press the Submit button
– Two
- Cascade allows you to move files/folders by clicking and dragging them in the left navigation bar
- To move a file/folder,locate it in the left hand navigation
- click and highlight the file/folder
- do not loosen your finger
- with the file/folder still clicked – drag it into the folder in which you want it to go
- the folder will highlight when you hover the file/folder over it
- Let go of the click when the file hovers over that folder.
- a screen will appear that shows you the file name and the new Parent folder
- if it looks correct press Submit
Rename
Any file or folder in Cascade can be renamed
note: using this method you can move and rename at the same time
- highlight the file or folder to be renamed
- select the Move/Rename tab on the top of the page
– or –
select Move/Rename from the down arrow next to the file name
- System Name – put the new name of the file/folder
note: if the file has a suffix the new name must also have the suffix, for example oldname.pdf should be newname.pdf
- be sure the Unpublish Content box is checked
- Press the Submit button
Posted in syndicated-posts, Training
The following is documentation for the Cascade upgrade that will take place October 15h, 2013.
To upload an image to Cascade, first locate the folder where the image will live. Usually, this folder is named “images”. If one does not exist, you should create one.
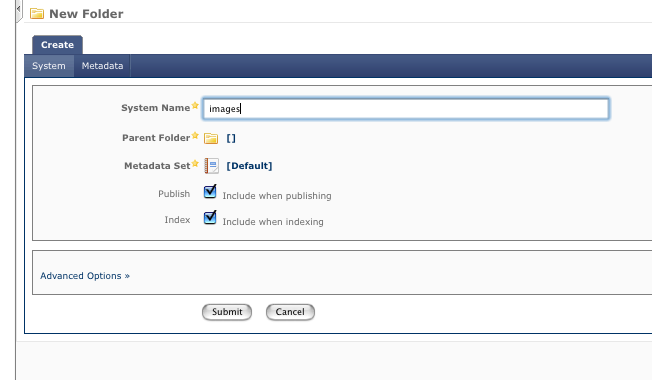
Creating a folder named “images”:
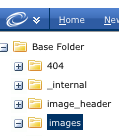
- Click on Base Folder
- Select New > Folder
- In the System Name field name the folder “images”.

- The Parent Folder is already set to /
- Metadata Set is already set to Default
- Publish – Include when publishing is already checked
- we do want this folder published
- UNCHECK Index – Include when indexing
- we do not want this folder to be included in the site navigation
Uploading an Image
Posted in syndicated-posts, Training