Extended Package Room Hours
Aug. 29, 2013 by jgoldfield
WesStation will have extended package room hours this weekend, Saturday and Sunday from 10:00am – 02:00pm.
Thanks,
Allen Alonzo
in one place
Aug. 29, 2013 by jgoldfield
WesStation will have extended package room hours this weekend, Saturday and Sunday from 10:00am – 02:00pm.
Thanks,
Allen Alonzo
Aug. 27, 2013 by jgoldfield
We are getting reports that message waiting indicators on the Nortel phones may be out of synch. We have reset the system and now they should be working properly going forward. In case you received a message during the interruption, please be sure to check for messages even if your light is out.
Thanks,
Allen Alonzo
A.nnotate is an exciting product that integrates with Moodle to provide an interface for collaborative markup of images and PDF or Word documents. It is a digital version of printing out a document and appending sticky notes with comments, reminders, or other text, and being able to easily keep these comments private or share them with others in a class, turning each comment into a possible discussion thread.
Activating A.nnotate (for instructors)

 To use A.nnotate for your class, you must first have a course Moodle page. On your main course page, after turning editing on, you will need to add the A.nnotate block. This will cause two things to happen: A new A.nnotate block will show up on the side of the page, which provides the purpose of logging in directly to A.nnotate, and all documents or images will have appended a new button that looks like a red pencil.
By default, A.nnotate is set up to only allow private documents. This is good if you just want students to be able to make personal notes directly on the documents. However, the real strength of A.nnotate is in the collaboration; to turn this on, you will need to click the yellow pencil icon on the A.nnotate block to access the settings. Be sure to switch the Access to Group and enter your name as the Master User to tell A.nnotate that you are the  course instructor.
Connecting to A.nnotate
To connect to the A.nnotate system, simply press the red pencil icon next to any document or image. This will cause A.nnotate to load and log you in. If it is your first time connecting, an account will be automatically![]() created for you based on your Wesleyan ID (which you are using to connect to Moodle). The document or image you have selected will also be loaded into your personal A.nnotate files. If instead you wish to just connect to A.nnotate and see all documents and images you have brought over, or wish to add your own independently, simply click the “Log on directly” link in the A.nnotate block.
created for you based on your Wesleyan ID (which you are using to connect to Moodle). The document or image you have selected will also be loaded into your personal A.nnotate files. If instead you wish to just connect to A.nnotate and see all documents and images you have brought over, or wish to add your own independently, simply click the “Log on directly” link in the A.nnotate block.
Using A.nnotate
When a document is loaded into A.nnotate, you will see a grey bar at the top that allows you to do things such as page through the document; orient your notes to the text, side columns, or as footnotes; and find keywords (for text documents).  To add notes, simply highlight the text you wish to annotate (or draw a box around a section of the image) and type in the dialog box that pops up. Here you can also decide whether the comment should be visible to you alone or to anyone else who also loads this document into their a.nnotate space. While the private feature is nice for note-taking and personal reminders, the sharing feature allows a class to hold a discussion on a specific part of a text directly within the text itself. After clicking Save, the note is appended to the document. The note can be edited, re-colored, resized or moved around at will.

Collaborating with A.nnotate
 For purposes of personal annotation, the process ends here. However, if a comment is set to All viewers (as above), then another member of the class who loads the PDF in A.nnotate via the course Moodle will see it. They can of course add their own independent comments, or they can click on any comment they wish and hit Reply to begin a discussion. An annotation will display the number of replies to it, and any user, including the initial poster, can simply click again to view all replies.
Organizing with A.nnotate
Connecting to A.nnotate directly via the block in Moodle takes you to a list of all documents and images you have imported, regardless of the class they are from. This view can also be achieved from inside any document by clicking the “Back to Index” button in the grey navigation bar at the top.

From this view, you can organize your documents into topics, courses, or any other structure you prefer. Right-clicking on a file allows you to rename or relocate it into a new folder or even make a duplicate copy. You can also access your specific account settings by clicking on your name at the top and “Edit Settings”. The most useful setting here is adjusting how often, if at all, you receive email updates of comments added to your documents.
Aug. 23, 2013 by jgoldfield
We are experiencing problems with out going phone calls. We are working with AT&T to resolve the issue. As soon as we are back to normal we will let you know.
Thanks,
Allen Alonzo
Aug. 23, 2013 by jgoldfield
We are experiencing problems with out going phone calls. We are working with AT&T to resolve the issue. As soon as we are back to normal we will let you know.
Thanks,
Allen Alonzo
Aug. 21, 2013 by jwest
We have OFFICIALLY moved to MOODLE version 2.3 as the campus system. The prior instance of Moodle is now at http://moodle1.wesleyan.edu. It will remain as an ARCHIVE with access limited to individuals with the Teacher role.
For assistance moving a course Moodle from the old to the new server, please contact your Academic Computing Manager.
For assistance moving a non-course Moodle, please contact Jolee West (jwest@wesleyan, x2763)
Aug. 15, 2013 by jgoetz
As of August 13, 2013, we have redirected http://moodle.wesleyan.edu to point to the upgraded Moodle 2, which will be housing all courses beginning Fall 2013. Following are detailed instructions to move your materials from Moodle 1 (Now accessible via http://moodle1.wesleyan.edu or the Archive link in your Portfolio).
Getting Material Off Moodle 1
1) Open your course in Moodle 1 (by now typing moodle1.wesleyan.edu into your browser, or selecting Moodle 1 in portfolio)
2) Under the Administration block, select Backup.
3) Select the documents you wish to migrate. Don’t worry about User Data, since you’re bringing everything into a new class with new students, and the grades, etc., will always be archived on moodle 1. Leave all other settings as default and hit Continue on this and the next two screens. Be aware that if you have an especially large backup, with many files, each new screen may take up to a minute to process.
4) After the continues, you will end up in the Files section of your Moodle with a file called backup-coursename-date.zip. Download this file to your computer; you’ll need it for Moodle 2.
Putting Material On Moodle 2
1) Be sure you’ve requested your course, as usual, via the Moodle Request link in portfolio. Once your course exists in Moodle 2, navigate to it (moodle.wesleyan.edu or the “Moodle” link in portfolio).
2) In the Settings block, click Restore.
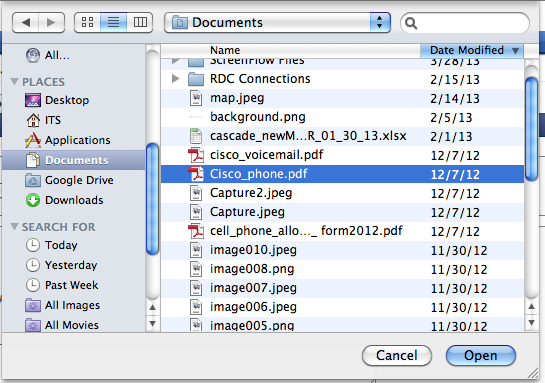
3) Drag and drop the ZIP file you just created into the Files box, or navigate to it by clicking “Choose a file”, then click the Restore button
4) Click Continue past the “not a standard Moodle backup” warning; the restore process will take care of this. Click “Continue” again, then “Next”, to get through two more screens.
5) Select the files you want to upload into the new course. Likely this will be everything, based on what you archived previously. Be sure “Include legacy course files” is set to Yes. Click “Next”, then “next” again, then “Perform restore”. Again, prepare for a large course to take upwards of a minute.
6) Click “Continue” and you’ll be returned to your course page with all your loaded-in files. Take care to change dates and hidden/visible status of items as relevant.
Aug. 15, 2013 by jcarlstrom
You can upload a new PDF to replace or update a PDF you have previously uploaded to Cascade.
In order to do this you need to:

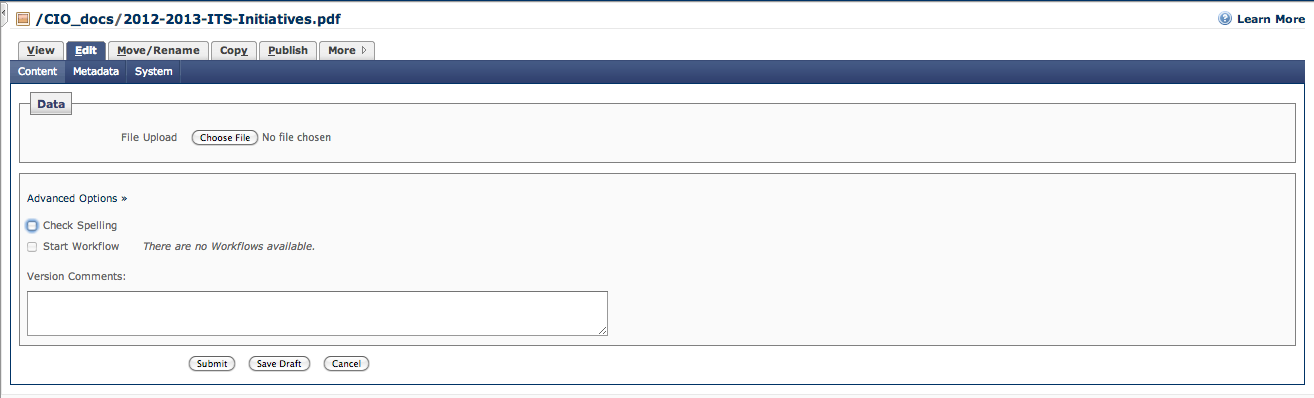
NOTE: You do not need to change the name of the file on your computer or on Cascade, the new PDF will take the name of the old PDF you are replacing that is already on Cascade. You can also do this to replace existing images or word documents.
Aug. 15, 2013 by jcarlstrom
Wesleyan has launched the newly redesigned Public Safety website. You can visit the site here: www.wesleyan.edu/publicsafety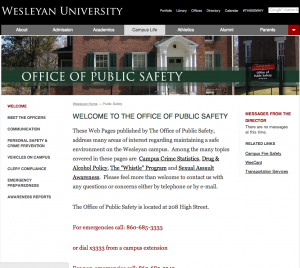
Jul. 29, 2013 by Karen Warren
Another message is circulating that is NOT legitimate. This one simply contains a link to Wesleyan University Contact Update. The sender is not affiliated with Wesleyan and likely is from a compromised account from another institution. As with the message last week, this is not from a Wesleyan address nor signed by anyone from Wesleyan.
Many of our systems including WesFiles, Google Apps, and Moodle, allow us to send messages and share files directly. Emails generated from those systems include links to files and folders. This is obviously a useful feature that most of us use. ITS staff are no exception. Those links may well require you to login to access those files.
However, ITS does not send requests for personal information or password changes through emails with links or via document sharing. Any such email will include instructions as to how to update information, but will not send you there directly.
All ITS Blogs © 2025 All Rights Reserved.

44 Wyllys Avenue
Middletown, CT 06451
60-111-1111
© 2014 Wesleyan University


